How to draw a cartoon face
March 15, 2021
I want to preface this by saying I am in NO WAY a professional, but these are just some tips I wish I had learned when I started drawing. Ever since around 6th grade, I have been obsessed with creating art. Specifically characters. I loved the idea of making my own people, and I want others to feel the joy I feel when making characters. This is a how-to-draw cartoon face (with pictures) for both digital and traditional artists. Some steps will be solely for digital artists, as the format might be a little tricky, but anyone should be able to follow this. Also, a warning to beginning artists: it’s not gonna look perfect the first time. It might look a bit rough, but that doesn’t mean you aren’t good! You just have to train your muscles. Another warning to those out there, this will only be the face, which excludes the hair due to it being a complicated subject and should deserve its own article. With that being said, let’s get started!
Step One (for digital artists):

For you digital artists out there, I use Medibang Paint Pro, but this should hold true for all digital platforms. In the bottom middle left of the screen, you’ll see the brush control. The two scales should be put around 3 pt for the brush size and around 30% for the opacity. I find this to be the easiest setting for sketching! *Note, for traditional artists, draw super lightly!*
Step Two:
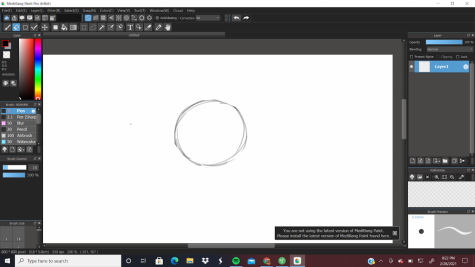
First, let’s start with a simple circle! It’s okay if it’s a little messy, it’s just the sketch.
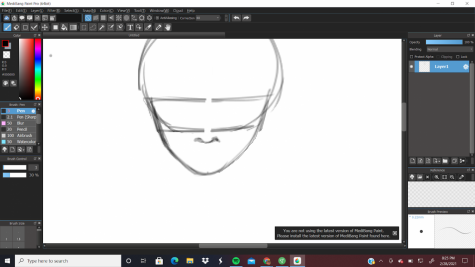
Step Three:

Next, we’ll put guiding lines in order for the face to be proportionate. The two horizontal lines indicate where the eyes are gonna go. The vertical line running from the top to out of the circle is gonna mark where the chin is.
Step Four:

Then, we’ll put the cheeks down. Run your pencil from the end of the vertical line upwards until you reach the base of the circle. Do this for both sides, until the basic shape of a head is formed!
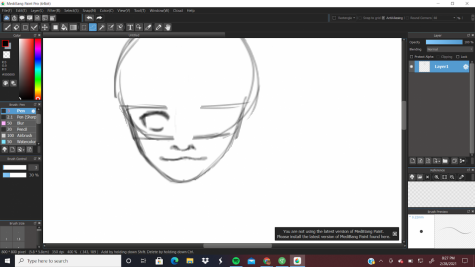
Step Five:
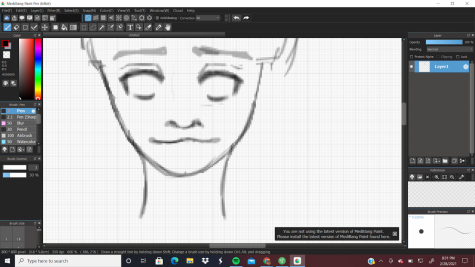
This is where this might get tricky, but that’s okay! Keep going. Since we’re done forming the chin/cheeks, you can go ahead and erase that. But that means we can start on the nose! Looking at the second horizontal line, go ahead and make a wide-looking U for the tip of the nose a little under the horizontal line. For the two nostrils, make upside-down U shapes and shade them in a bit to give depth.
Step 6:
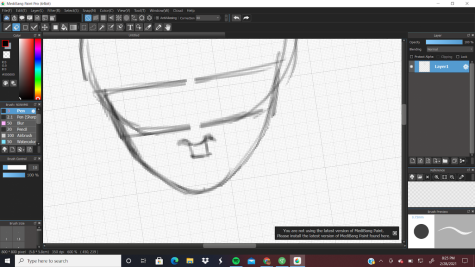
From that wide U mark we made for the tip of the nose, go ahead and make two straight lines. This will show where the top of the lip should go and how wide it should be. You can draw the top lip by drawing a semi-straight line.
Step 7:
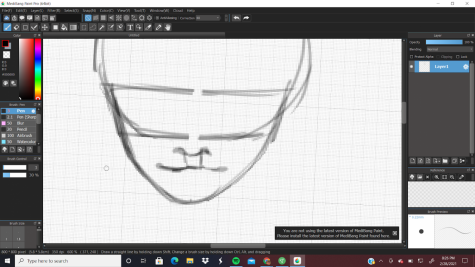
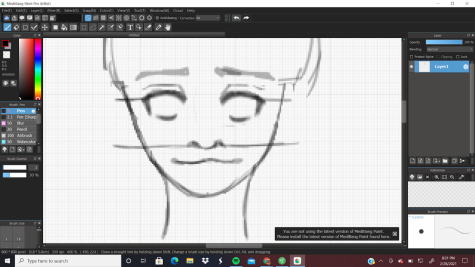
From there, you can make curved lines to indicate that your character is smiling! Try to make both sides as equal as possible!
Step 8:
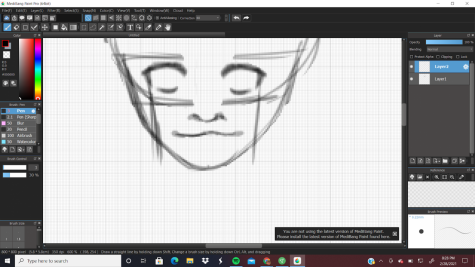
Again, this part might be tricky, but let’s start off by erasing those pesky lip lines from before. The thing with eyes, especially my style, can be a range of sizes because eyes are not alike on any person. However, for this tutorial, I went for a kind of wide, anime-styled eye that I first learned from. For this eye, I started from the top and made my way down. The top of the eye I made a little lower from the first horizontal line and made a smooth curved line. And for most anime styles, it has a long eyelash line that goes straight down. For the base of the eye, I usually don’t connect it to the lash line since it’s my personal style, but you can totally do that if you want! The base lash is going to mark how big of an eye you really want, so I just added a nice curve a little bit away from the second horizontal line.
Step Nine:
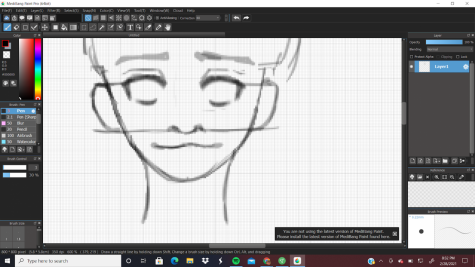
Okay, so, if you haven’t heard already from other artists, drawing an identical second eye is a pain. However, with practice you should be able to do it with ease… but even I still struggle with it, and so many other artists do too! Once you’re finished with the other eye, you’re gonna mark two vertical lines running from the lash lines. This will indicate where you should put the start of the neck.
Step Ten:
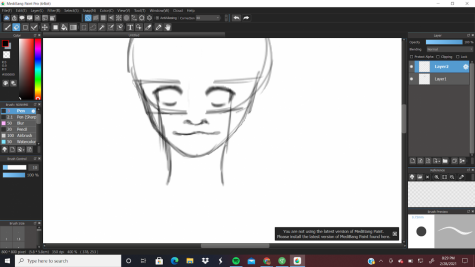
From there, you will want to make a slightly curved line to show the neck. For some characters, they might be more skinny, and you can always add the outline of the bones inside the neck, but for this character, I kept it nice and simple.
Step Eleven:
For this easy step, I recommend erasing any unnecessary lines that aren’t gonna be in use anymore!
Step Twelve:
Here we start with the details! Right above the eye I usually put a skinny curved line to indicate that’s where the eyelids are. You don’t necessarily need to do this, but it does add to the complexity of it! Also, add some eyebrows. To do that, add just a thicker curved line. Curved lines are the key to drawing in this style!
Step Thirteen:
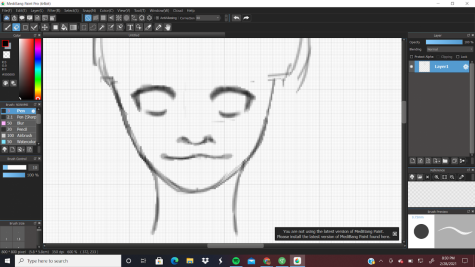
Then, you should draw two horizontal lines. One running from the eyelash out, and one running from the nose out. This will mark where ears should be placed.
Step Fourteen:
For this particular style, ears don’t have to be super detailed. What I usually do is just draw two half ovals on the side of the head and call it good.
Step Fifteen:
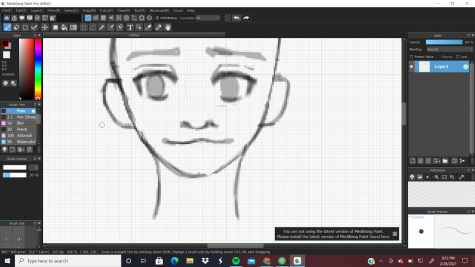
Now, in order to not make your character look dead, just add the outlines of the pupils. Once again, they don’t have to be exactly this size!
Step Sixteen (digital artists):
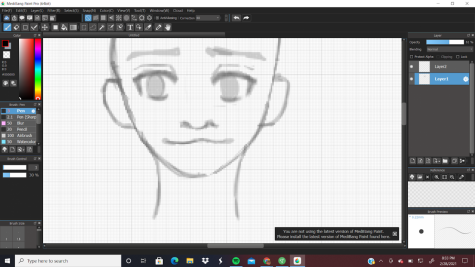
As you’re getting ready to finalize your character, you should add another layer to the drawing for your lineart. However, before you click on your next layer, you should lower the opacity of the sketch layer (layer 1). In this program, that would be in the top right corner, and I find that 60% opacity is the best. You don’t have to necessarily do this step, but I find it easier to differentiate the line art with the sketch layer. *Note: Remember to make sure you’re on the second layer for the lineart! You’ll thank me for this reminder later.
Step Seventeen:
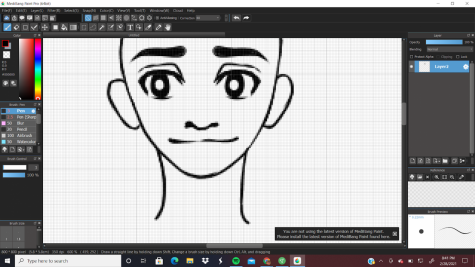
For this last step, you should just go over your sketch with a darker color. For traditional artists that would just be a ballpoint pen or skinny sharpie to go over your lines. For digital artists, that would include just upping the opacity of the pen, which would be in the middle left side of the screen, like in the previous step. You can also add some details, as I did, in the eyes. I just erased the middle of the iris to show the pupils. Also, digital artists, feel free to delete the first layer, as you are done with your sketch!
Look! You’re done! A lot of steps, I know, but I hope these helped with your beginning stages as artists. It’s okay if it doesn’t look like mine, because I’ve been practicing for years. And as you progress and become more individualized in your art, you might even develop your own style of art! Art is so subjective, and there is no wrong or right way to do it. But have fun with it, and don’t stress yourself out too much!