How to make a Christmas wreath
January 7, 2021
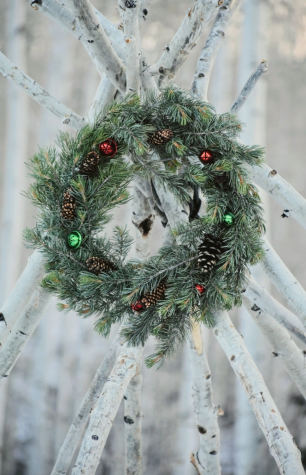
In this tutorial, we will learn to make this.

Nothing brings a family together like shiny presents stuffed under an evergreen, or blankets of snow freezing the landscape but warming the hearts of those gathered around the cozy, lavish meal inside. Christmas is probably the most anticipated holiday in this country. Decorations can clutter a room to no end, but those decorations sometimes cost more money than the gifts themselves! But fear not, the Christmas aesthetic does not have to be manufactured. This is how to create a Christmas wreath with materials you already have lying around the house, with the exception that you will need some access to nature.
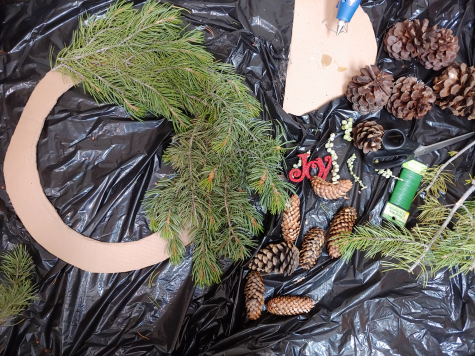
Materials
- Cardboard (thick)
- Pencil
- Scissors
- Clippers
- Pine bows
- Hot glue
- Fishing line
- Christmas bulbs
- Bells, pinecones, bow (optional)
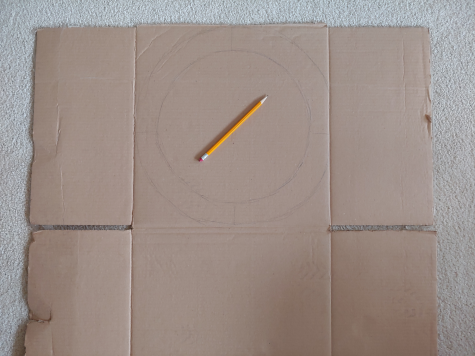
Step 1
First, take your cardboard, which should be a fairly large piece (pencil for scale), and draw out a thin donut, as you can see below. Make sure to only draw on one panel, do not cross the creases or the design will not be as sturdy. Make sure the donut is roughly the same width all the way across.
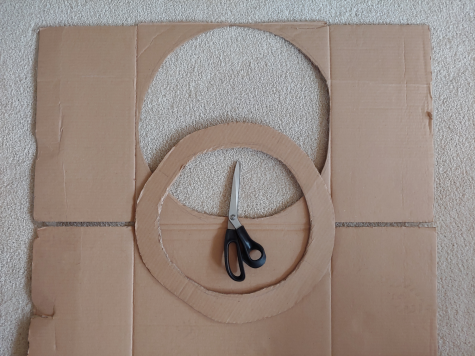
Step 2
Cut out the donut as shown. This will be the backing of our wreath. I know, it doesn’t look like there is a drop of potential in this, but trust me.
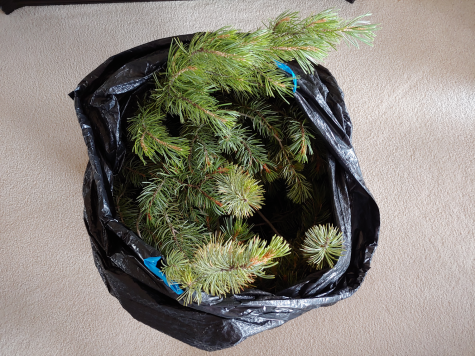
Step 3
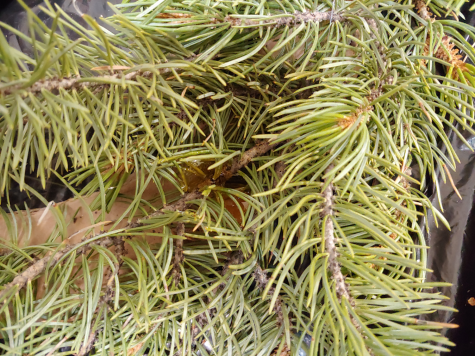
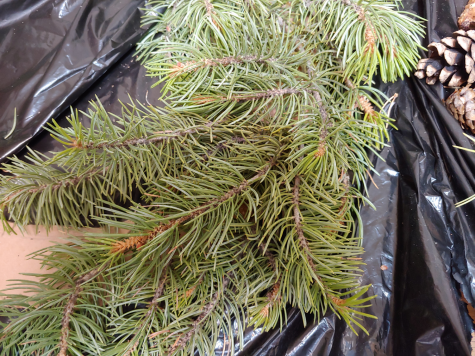
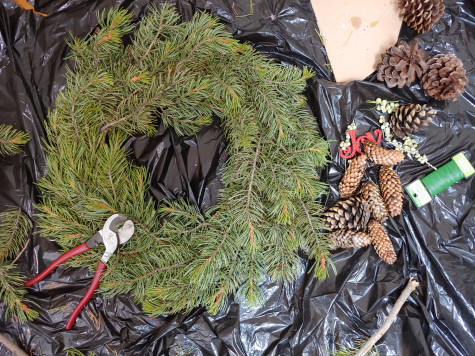
Cut some pine bows (thick, full branches) off of whatever sort of evergreen you have access to with your clippers. Make sure they are healthy and bendy to prolong the life of your wreath. You are looking for branches covered in needles, with not much visibility of the wooden framework. Cut off anywhere from 1 foot to 2 feet long segments and a lot of them. You will not use all of this, but it is better to have too much than too little. I stored mine in a trash bag to not make a huge mess.
This is one of the bows I cut off, but as you can see, this is too big, so I cut it into several pieces.
Step 5
Place hot glue on the cardboard and push the base of the branch into it with firm pressure. While continuing to add pressure, drizzle another coat on top for a solid hold.
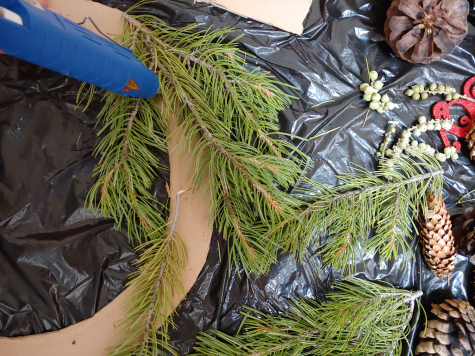
You may notice that the glue will show once the branch is set. It is a simple fix, just add another limb on top!
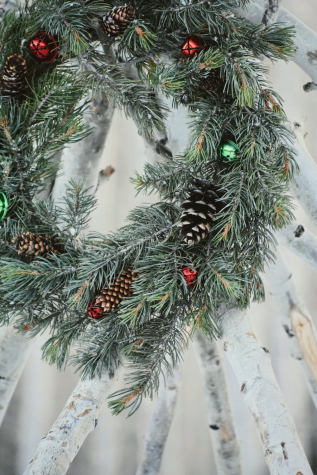
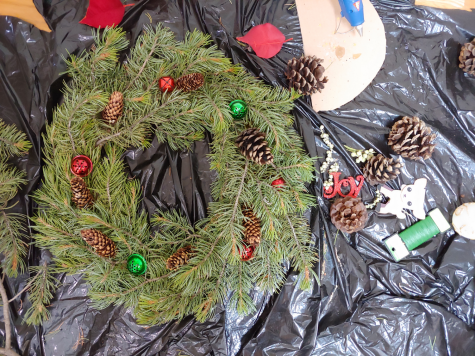
This is the halfway point of mine. Notice how thick mine is, which is accomplished by having 2 to 3 layers of branches stacked on top of each other to hide the glue and fill in the gaps. When placing these down, do not worry about having a uniform shape. Allow some branches to stick out while others tuck in.
The final product of this step.
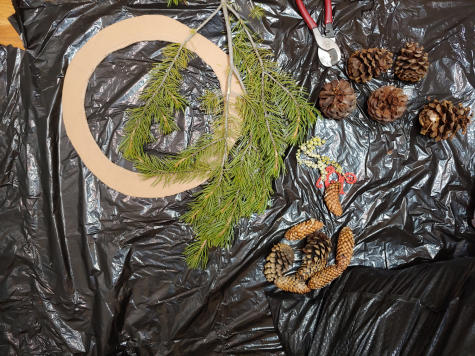
Step 6
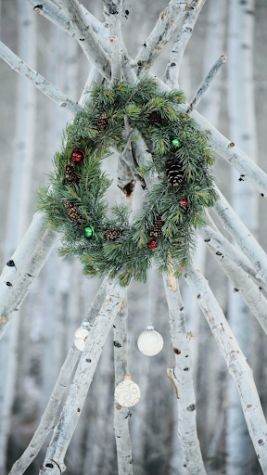
While you could stop here, I want to add a little bit more pop and color to mine, so now we will begin adding some optional extras. I chose to add pine cones because of the texture and color contrast while still keeping a natural, rugged feel to it. I added bells for not only the same contrast but for an aspect of sound. Nothing says Christmas like jingle bells, and I will hang this one outside so the bells ring in the wind. Both the pine cones and bells are also hot glued.
Step 7
Great, we are almost finished! Now we need a hook to hang it if planning on putting it on a wall or door. One method is to use a thin wire made into a loop and hot glue it onto the back of the cardboard.
But I still was looking for an extra pop, something to truly set it aside from the ones I see in stores. I decided to hang bulbs off of a fishing line which is looped over the bottom of the wreath in three places.
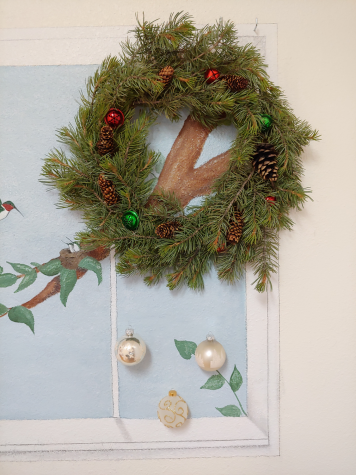
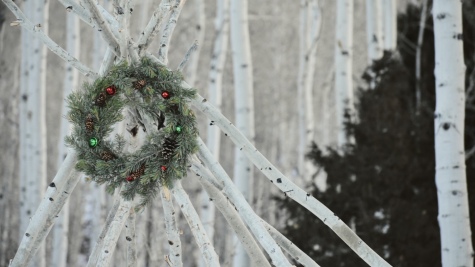
And we are done! This will make a fine addition to any door, wall, or outdoors location. Enjoy some photos I took of mine.